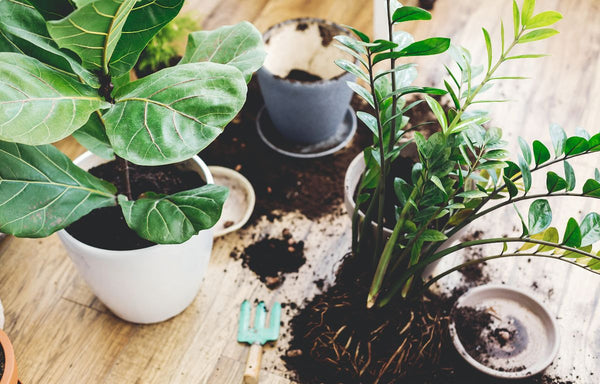
Repotting Fiddle Leaf Figs
The Fiddle Leaf Fig (Ficus lyrata) has quickly become a staple in homes across Europe, admired for its broad, glossy leaves and its ability to enhance interior spaces. However, caring for this popular plant involves more than just watering—it requires timely repotting to keep it healthy and thriving.

The Importance of Repotting
Repotting your Fiddle Leaf Fig isn’t just a periodic task; it’s essential for the plant's well-being. Here’s why:
Space for Roots to Grow
As your Fiddle Leaf Fig matures, its roots will naturally seek more room to expand. When left in the same container for too long, the plant can become root-bound, with the roots wrapping tightly around themselves. This restricts their ability to absorb water and nutrients, stunting the plant’s growth. Repotting gives the roots more room to spread and allows your plant to grow properly.
Restoring Nutrients
Over time, the potting mix in your container loses its nutrient content as the plant absorbs it. Repotting is an opportunity to refresh the soil, providing your Fiddle Leaf Fig with the nutrients it needs to remain healthy and vibrant.
Preventing Pests and Disease
The soil can become a breeding ground for pests or harbour plant diseases over time. By repotting, you can inspect the root system and replace any infested or unhealthy soil, helping to prevent potential issues before they become serious.
When is the Best Time to Repot?
In Europe, the ideal time to repot your Fiddle Leaf Fig is in spring or early summer, during its active growing season. This allows the plant to adapt more easily to its new pot. Repotting during the colder months, particularly winter, should be avoided, as the plant is likely to be dormant.

Step-by-Step Guide to Repotting
Now that you know why repotting is crucial, let’s go through the process to make sure your Fiddle Leaf Fig thrives.
Step 1: Gather Your Materials
Here’s what you’ll need to repot your Fiddle Leaf Fig:
- A new pot with drainage holes, 5-10 cm larger in diameter than the current pot.
- A high-quality, well-draining potting mix.
- Pruning shears or scissors.
- Gloves.
Step 2: Prepare the New Pot
Choose a new container that’s slightly larger than the existing one to give the roots more space. Ensure it has drainage holes to avoid water buildup. Fill the base of the new pot with fresh potting soil.
Step 3: Remove the Plant from Its Current Pot
Carefully tilt your plant and gently tap the pot to loosen the root ball. Hold the base of the plant’s stem and carefully lift it out. If the roots seem tangled or compacted, loosen them gently with your hands.
Step 4: Prune the Roots (if needed)
If you notice roots circling the root ball or any damaged roots, it’s a good idea to trim them using clean pruning shears. This encourages new root growth and prevents the plant from becoming root-bound again.
Step 5: Repot the Plant
Place your Fiddle Leaf Fig in the center of the new pot, making sure it sits at the same depth as in the old one. Fill the pot with fresh soil, pressing it gently around the edges to hold the plant in place.
Step 6: Water the Plant
After repotting, water the plant thoroughly until water flows out from the drainage holes. This helps settle the soil and removes any air pockets that may be around the roots. Be cautious not to overwater, as this can lead to root rot.
Step 7: Post-Repotting Care
Once repotted, place your Fiddle Leaf Fig in a bright location with indirect sunlight. Water it when the top layer of soil feels dry, but avoid overwatering. Hold off on fertilizing for about four weeks to let the plant adjust. Monitor it closely for signs of stress, like leaf drooping or yellowing, as it acclimates to its new pot.
For readers looking to repot their Fiddle Leaf Figs, exploring the Top Indoor Plant Pots Lisbon can provide inspiration for pots that combine style and functionality. Similarly, The Best Indoor Plant Pots Portugal highlights options that ensure your plants thrive indoors.
Repotting your fiddle leaf fig is easy with tips from How to Safely Remove a Root-Bound Plant Without Causing Damage. Complement your fig care with broader insights in Radical Gardening Techniques to Rescue Failing Houseplants. For design inspiration, check out Stylish Indoor Plant Pots for Every Home and Garden Enthusiast.
